Monday, March 4, 2013

Back to regular posting...hopefully


Hard to believe it, it has been almost a year since my last post. So what happened and what have I been doing with my time. Well I have been  busy working on projects and playing games.

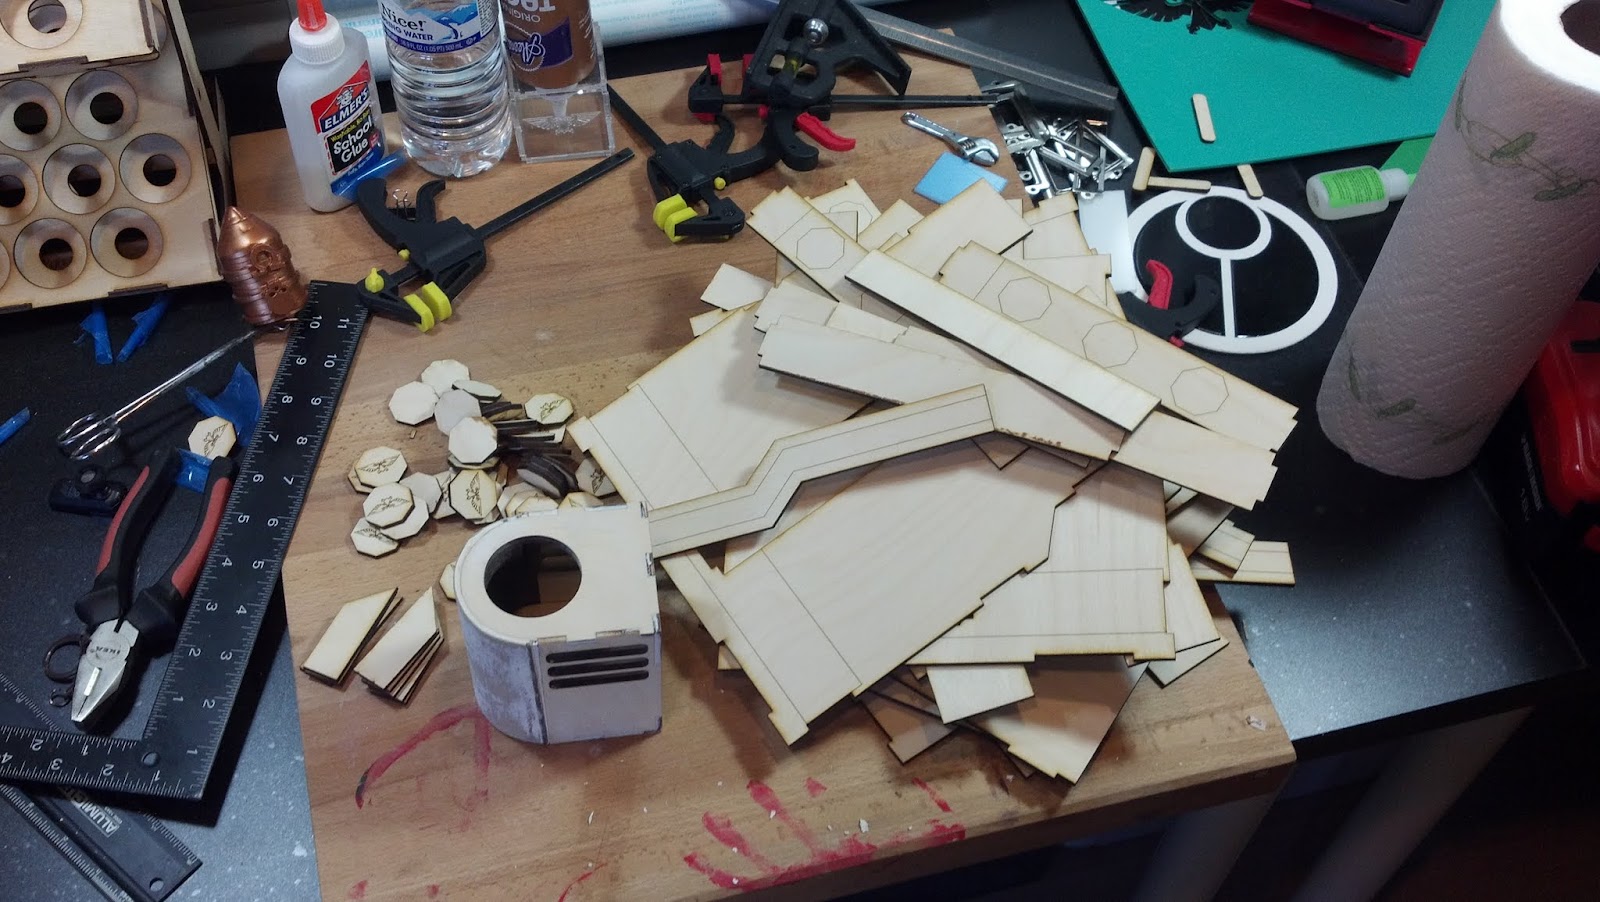
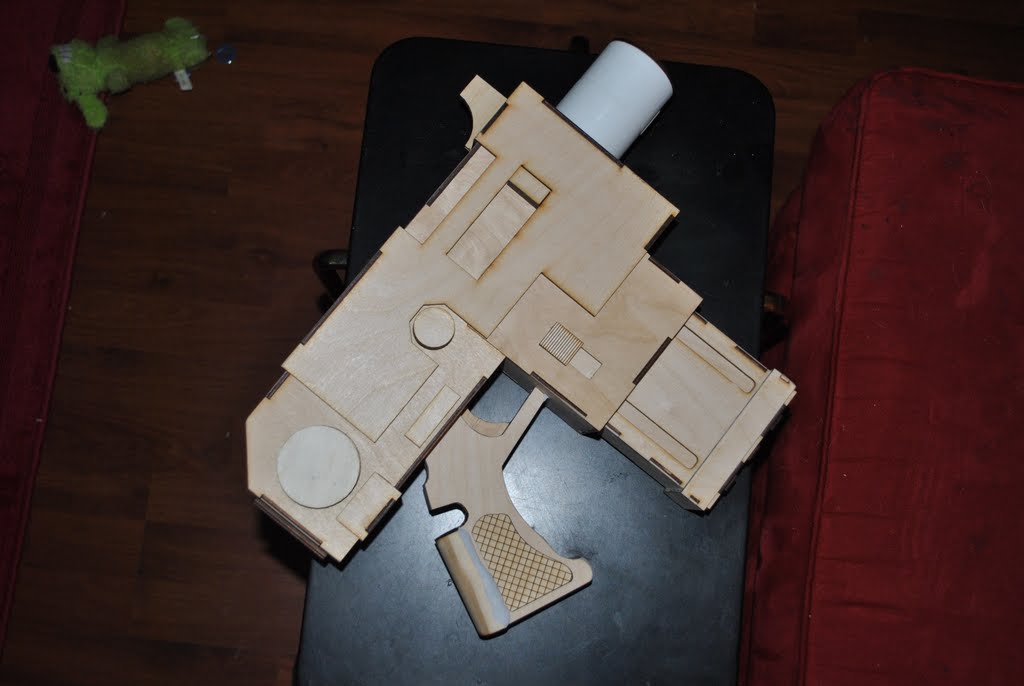
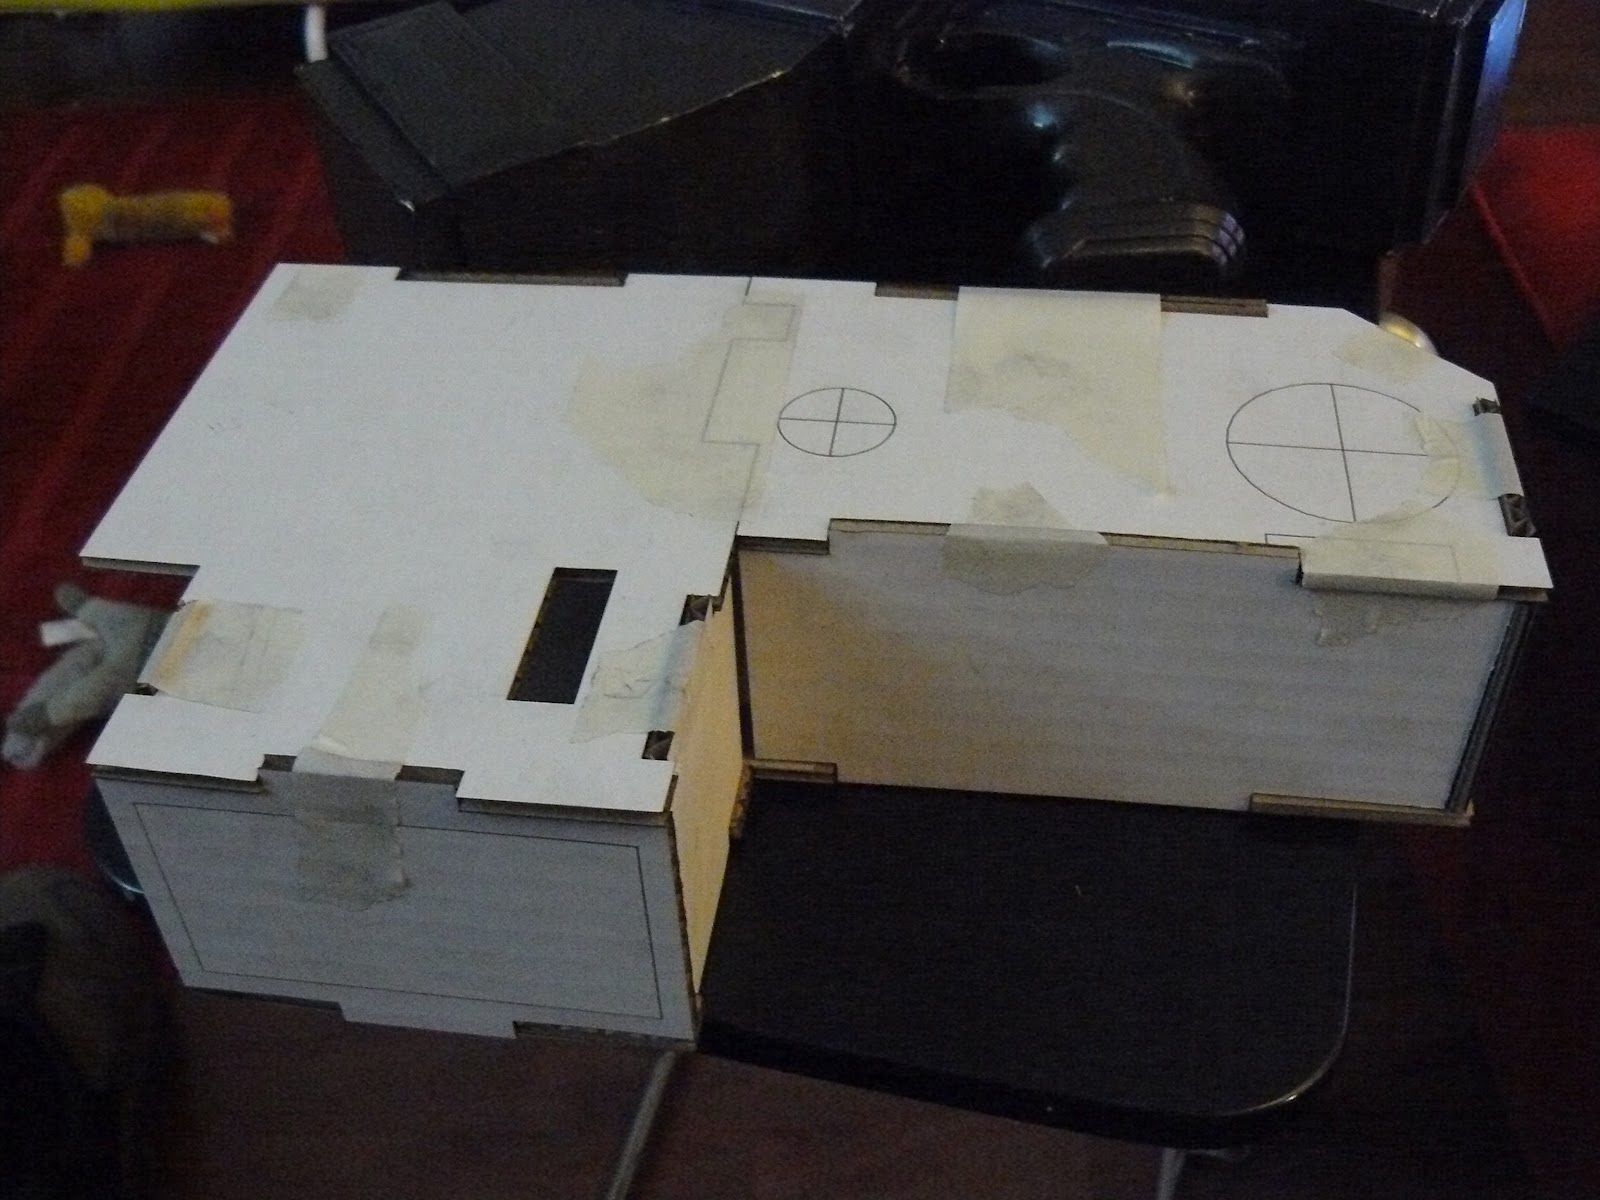
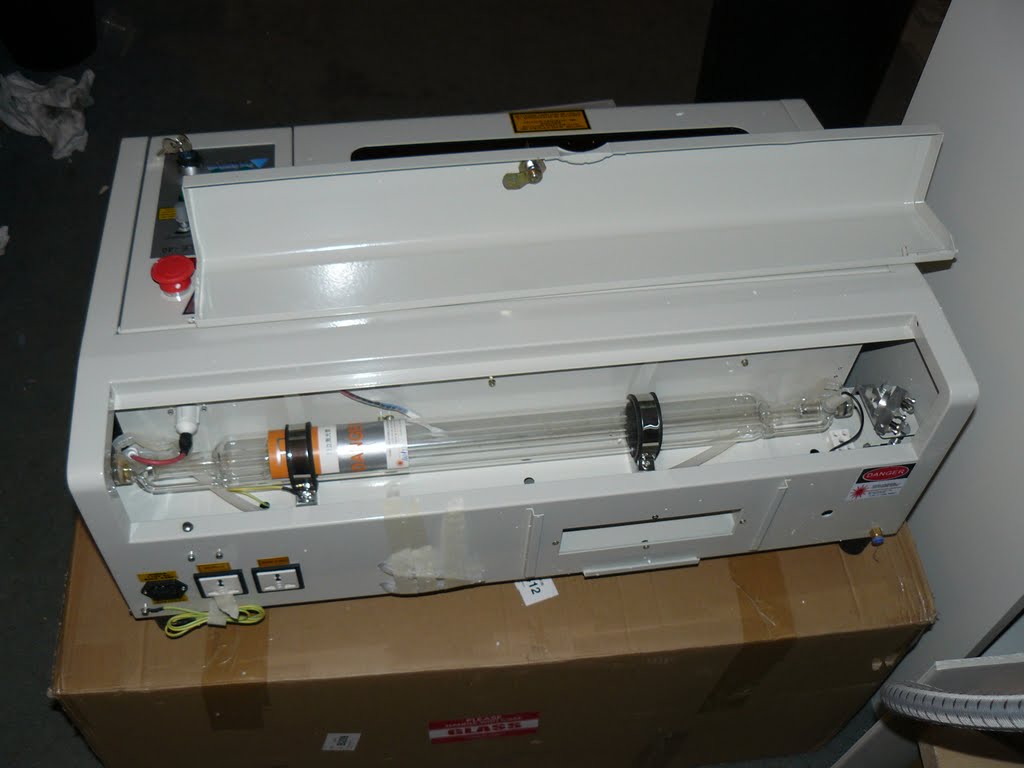
On the project side, if you have been following along on my other blog/store www.burnindesigns.net, I have been creating all sorts of things. Paint storage units, Zombicide tokens, terrain, lots and lots of terrain. Having a laser cutter and being able to easily and repeatably cut projects out makes it a little easier to work out ideas. Instead of the rack of terrain that is full of half finished, waiting for parts, crap no glue in the world will stick to, it still looks like a milk jug with bits of wood stuck to it I now have a rack of usable prototypes that seem to walk away regularly and completed table ready projects. This is great. The only side effect to this is the stacks and stacks of left over wood scraps. At least those will see usage as bonfire material.

For the game side I have been stepping back from 40K and have picked up Infinity. The game has a unique mechanic and I am starting to like it. It is allot more tactical than 40K. Sorry bit no Bright read armor marching out in the open here. You have to work to close ground if you want to get there in good enough shape to do anything. Terrain makes a huge difference in this game.


Other games I have picked up or gotten back into are Battletech/Robotech. It feels good to bring back one of my tabletop gateway drugs. The skirmish level play and resource management makes for some great battles. Do you charge with your damaged side for the quick kill or do you go the long way around so  you put your strongest face towards the enemy? Decisions, decisions.

Finally there is the board/card game side of things. Settlers has become my time waster game. Great when you want to think but not setup a full table game or I have non gamers over. Super Dungeon Explore is the perfect gamer party game. Nothing like and expandable, coin op game with miniatures. The game play is fast and the chiba minis are just cool. My last game is turning into an addiction, Zombicide. I love this game! The rules are simple, game play is co-op so it is easy for non-gamers and it is so much fun. It has become a running Sunday afternoon game for me and my friends. We get together, poor some drinks, pull out the game and play for an hour as a warm up to watching The Walking Dead.


But wait there is more. Burn In Designs. I mentioned it earlier but now more details. Last year I started my own laser cutting business, Burn In Designs, specializing in gamer related projects. Things have been interesting and fun with allot of new products being released and a chance to give back to the gamer community. Projects and products have been pretty diverse. Everything from little bases and objective markers though a full city of 6mm/1:285th terrain to a new scifi themed walkway/road project that will hopefully be on Kickstarter shortly.


So there you have in the short version of what I have been doing. Now back to projects so I can have more stuff to write about next time.

Monday, July 9, 2012

Hammer of the Gods


Some projects take longer than others. This is one of those. Back at the beginning of March I sat down at the drawing table and in about 2 hours I had gone from online photos to drafting, cutting and assembly. Not a bad start. This is that start. The problem is the project has been sitting in the paint booth collecting dust for the past 2 months. Well it is time to pull it out and get it back on track. So lets bring you back up to speed and show you the project as it stand now.


Next time you see this project it will be out of the paint and another step closer to completion. Stay tuned.

Monday, March 12, 2012

Laser cut Bolt pistol ready for use

After several tweaks and changes and 5 test builds the plans are now complete. This has been a learning experience in materials quality, materials thickness, power setting and how the laser focus effects cutting width. It is funny how many little factors really go into the design.
I know it is a Bolter and not a Bolt Pistol, but it is a cool picture.


Lets go over the different builds and the problems and pitfalls that got us to the final version. First up the materials shift from cardboard to acrylic. The original idea was to build the main body out of 1/8th inch thick hardboard. The same stuff you base terrain on. Turns out there is too much resin holding it together to even begin cutting with a 40 watt laser. After checking the Full Spectrum Engineering forum, it was confirmed that the stuff doesn't cut without burning. Those plans dashed I went back to the hardware store and picked up some 1/8th inch plywood. Same issue, too much glue. The stuff engraves beautifully but the glue between the layers is too tough to cut. Back to the forum where I found a suggestion of going to Woodcraft and picking up plywood there. Quick trip to Amazon and the web, wood was on its way.

While waiting I switch to the one material I knew would cut cleanly, acrylic. My local hardware store has it in several thicknesses and I was able to pick it up for a reasonable price. A couple of hours later and a few miss cuts I was done and got this.
Shown upside down because the handle is not attached.

This is the first version and it was a great proof of concept. The thing looks good and will take paint with no really prep work required. The handle is not attached yet but it is a simple matter of epoxy and time. The downsides to this one is first cost. Acrylic is not cheap and would be great to use if I were using it as a casting base but I am not. Next is fragility, acrylic is not the most durable material and had a habit of fracturing if dropped. I can correct this by filling the thing with 5lb expanding foam but really this is more of a display piece. The last issue is weight. It is heavy. Noticeably so and adding anything to stiffen it will put more stress on the hand grip mount.

The wood arrived and cutting began. This stuff cuts as well as the acrylic and at lower power. I am using 25-35% speed and 40-50% power with little to no charring. I have found my new material of choice. The design didn't require any real changes from the transition to wood. There were a couple of shims I added to reinforce some of the joints but that was it.

Bolt Pistol v2 ready for primer and paint.

But I did do some changes with the build. Lets start with the barrel. The original plan for the build was to just use a piece of PVC pipe but I found that a pair of couplers and some wooden rings to beef it out fit the bill nicely. Next up was the magazine change. The square magazine on the acrylic version was out of necessity. Bending acrylic is not easy and not something I didn't want to deal with that. Wood is easier to bend but again why bother when a straight magazine looks good. That is what I went to. But why not take it up a level if I am going that way and make the design one that will allow it to be removable. So that is what I did. a couple of quick changes and 3 sets of magazine miss cuts and I ended up with a simple workable magazine that can be magnetized and removed. The alignment worked great but I hit one snag, one of the spacers needed in the gun body was a little off and I couldn't slide the last one in. Mental note, add the shims and spacers before you close up the gun body. Since I wanted to get this one done, I just fixed mounted this one.

Removable magazine and grip design.
The next change was the handle. I was going to cast this piece out of resin but just wasn't feeling it. I needed a better option then it hit me, why not just laminate several pieces together. About an hour at the drawing board and I had a piece ready to cut. A little glue, some quarter round and putty and the handle was done. Laminating pieces together gave me a little more freedom and I was able to come up with 4 different options using the same pieces. Kind of nice. This one is an inset with a diamond pattern. I also have a raised flat, raised stripped, inset stripped and smooth side design. The smooth designs are perfect for some custom work like engraved chapter symbols or inscriptions.

The last little bits were the knobs and switches that I also laminated to get the correct thickness and a little filler putty to clean up some of the angled joints.  That is it. Ready for the paint booth. Well almost. There were a few things I learned in the construction. First, Aleene's Original Tacky Glue is the best glue ever made for craft projects like this. It doesn't run and gives you plenty of wiggle room for alignment. Clamps, 4 and 6 inch bar clamps are a necessity. The more you have the easier things will be. Spring clamps help and having different sizes on hand is always good but the bar clamps really shine for not shifting the alignment of parts as you apply pressure. Sand all the parts first. This just common sense but it is easy to forget when you  get into the heat of building. Lastly don't throw away any scraps. They come in handy. Anyway, enough talk more pictures.


Thursday, February 23, 2012

Lasercut Bolt Pistol Prototype

I have almost completed my first production level project. This will hopefully be the first in a long line of kits. This one is planned for a mix of 1/4 inch and 1/8 inch materials. The final delivery will be a flat pack kit of the main body, sights and magazine. The barrel and grip will need to be sourced separately. I may offer a resin cast grip at some point but I am not ready for that yet. 

The prototype is a mix of cardboard and cloroplast. Both work well for prototyping because they are easy to cut and cheap. They are slightly thinner than the 0.25 inch material the design is for but it doesn't really effect the testing too much. 


Now to hit the hardware store for some 0.25 MDF and acrylic. 

Wednesday, February 15, 2012

To the victor go the spoils

Earlier this year Battle Foam and 40K Radio had a tray design contest. The goal of the contest was to get some new trays in the store for the different armies and showcase the versatility of the system. I chose to enter a few designs and 2 were chosen as winners. The designs were for a tau troop tray and a battle suit tray. Big thanks to the selection team for picking my ideas.

 First off one thing I hate about storing minis is having to go to multiple trays to find all the minis needed for a game. If you have a large army this can be a problem. Also it is hard to keep track of them and one fig seems to always get lost in the shuffle. So my idea for trays was to group the stuff in them as they would be in the game. Simple and no more dead space and all the common components in one spot.


This is the troop tray I came up with. It supports space for 25 standing firewarriors, 2 transports and 4 drones. That is 2 units of 12 troops and a spare space for a tank commander or ethereal and the transport drones. 2 troops and a commander in 1 tray, the bases for every army. Ok, a crappy commander but I was working with limited space. The tray is thick but a welcome sacrifice for ease of access and use.


Next is the battlesuit/broadside tray. It supports space for 9 suits on either 40 or 60mm bases. This means it will fit the uber cool Forgeworld Broadsides, I have a few of those, or any custom, scenic based suits. There are 3 small spaces for magnetic weapon storage at the bottom of the rows. Next is space for 6 smaller battle suites like the Stealth ones and 25 drones. That is 3 full units of broadsides and a max load out of shield drones, 2 - 3 man Stealth teams with drones and a little extra storage.

There you have it 2 trays and the bulk of the army is ready for the table. The taller trays also offer a little more protection than the thin ones because most figs will sit on their base instead of on their sides. Well that is it. Now go order some for yourself. I already am looking at getting another of each.


Wednesday, February 8, 2012

Sharks with freakin lasers on their heads.

All I asked for were sharks with freakin' lasers on their heads.

Well it looks like I finally got them. This is my newest tool and it will definitely ratchet up my projects a notch.  It is a 40w hobby laser cutter from Full Spectrum Engineering. It will cut materials up to 1/4" thick and installs like a normal printer. It is liquid cooled and uses a dc motor controller instead of servos motors for movement. This keeps the cost down. Unlike the Zing by Epilog I was looking at ($10K+), this one is only $2500. Adding in a stand and water the unit is still under $3k. So $7000 cheaper. That savings is great but payed back in setup time and learning curve. Luckily time is something I have.

I will work on the final setup an calibration over the weekend and hopefully have my first cuts done. For now here are the unboxing pictures.


LinkWithin

Related Posts with Thumbnails